
How to setup Hyper-V

Introduction:

In this blog, I will showcase how to setup Hyper-V in Windows and Install OS on Hyper-V

Pre-requisites:

  • Basic Understanding of Hyper-V
  • Understanding of OS Installation

Books & References:

Demonstration:

1. Enable Hyper-V through Windows:
Search for Turn Windows features ON or OFF in Windows Search and Enable Hyper-V

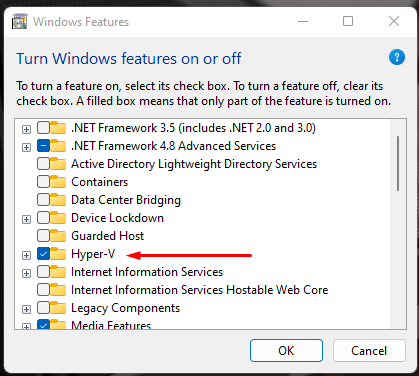
Once you hit OK, Hyper-V will be installed and the setup will complete. You will need to Restart your machine. 


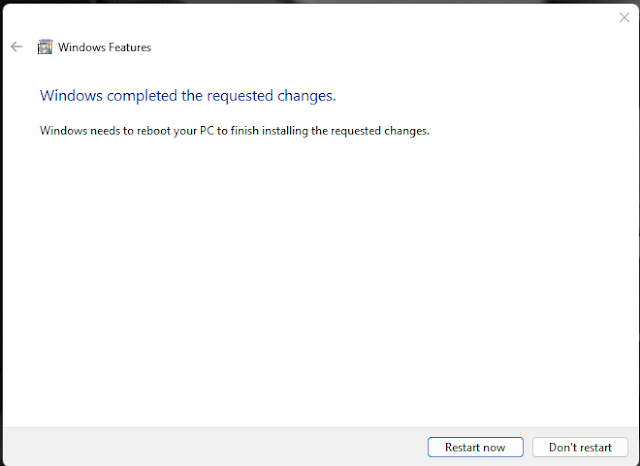
2. Creation of Virtual Machine in Hyper-V:
Once Hyper-V is installed, you can simply search for Hyper-V in Windows Search.

In Hyper-V, you will need to create Virtual Machine. Select New > Virtual Machine.

Add the Virtual Machine Name

Select VM Generation. This is similar to Legacy or UEFI Boot.

Select the Allowed Memory(RAM) for the VM.

Select Network Adapter

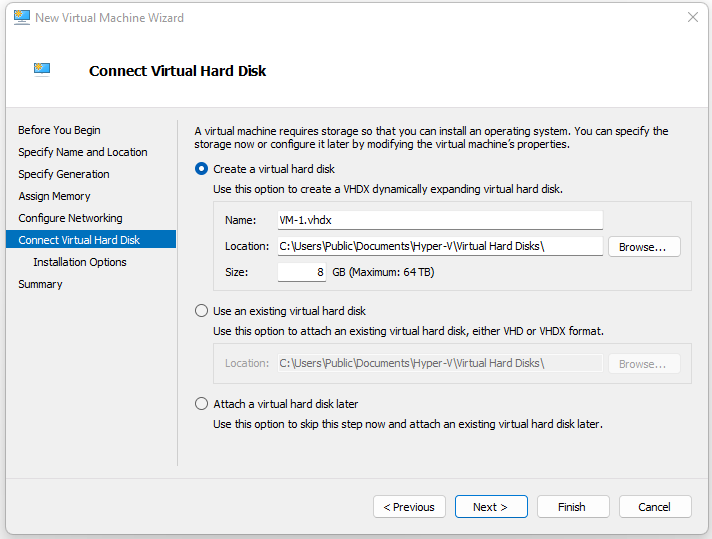
Create Virtual Hard Disk Drive and select the size for the same.

In order to Boot the OS, you will need the bootable drive or ISO image of the OS

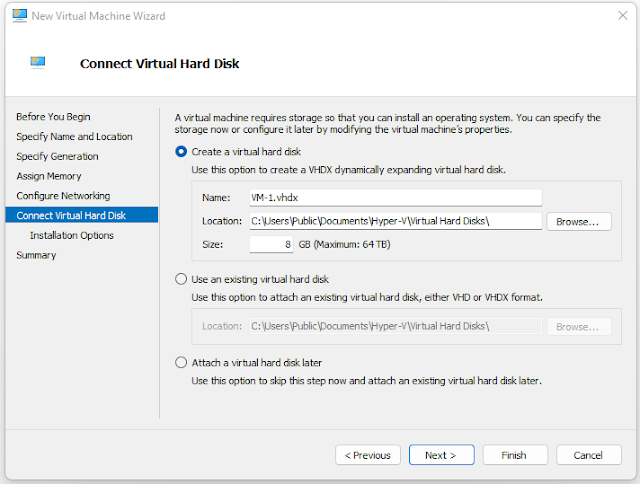
You can now go ahead and Finish the setup. At this point, your Virtual Machine will be created.

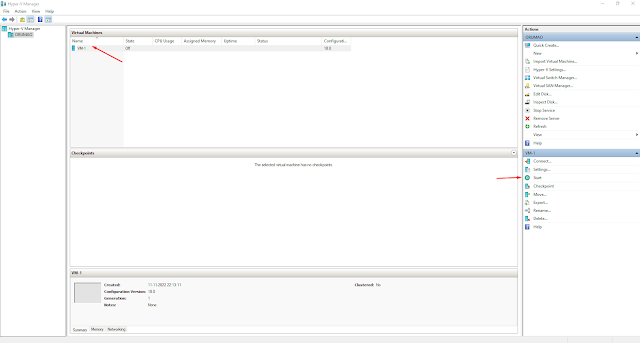
3. Start Virtual Machine and Connect to the VM:


Once, you have connected to the VM, you will see the Boot Screen right from BIOS to Booted VM


NOTE: In Order to set up Hyper-V, you will need Virtualization enabled.
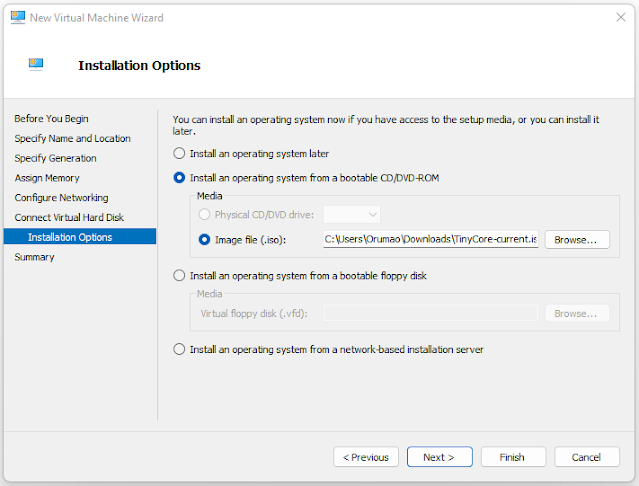
Conclusion:

I hope this process helps you set up your own Virtual Machine. There are many apps that can have similar functionality like Oracle VirtualBox, and VM Ware.

Cheers!!


Comments

Popular posts from this blog

Something went wrong. An Error occurred - Error Resolution

Introduction: With the installation of NAV 2018 or BC On-premise, I have observed that when creating New Server Instance and New WebServer Instance, you will get the error 'Something went wrong. An Error occurred '. I referred to the community questions below but didn't find my resolution. Hence, I decided to write this blog. Pre-requisites: Microsoft Dynamics Business Central - On-Premise / NAV 2018 Understanding of Business Central Authentication  Books & References: https://community.dynamics.com/nav/f/microsoft-dynamics-nav-forum/261301/nav-2018-web-client-an-error-has-occurred https://community.dynamics.com/business/f/dynamics-365-business-central-forum/421987/error-something-went-wrong-an-error-has-occurred-azure-ad-tenant Demonstration: 1. Creation of NAVServerInstance: In order to create NAVServerInstance, you can either add the Server Instance through Business Central Administration or Powershell command. Add Instance - Business Central Administration Add Insta

Universal Code Error and Resolution

Introduction: On Friday, May 12th, 2023, the Business Central On-Premise Production Environments started throwing universal code errors as follows. This occurred to every customer on a lower version of BC 19,20 and 21 irrespective of their localization, customization, and license. Pre-requisites:  Understanding of Technical Upgrade in Business Central On-Prem References: BC20 On prem. Universal Code requirement error after installing customer's license. - Dynamics 365 Business Central Forum Community Forum (40) Yammer : Dynamics 365 Business Central Development : View Conversation Root Cause: The certificate that signs Microsoft Base Application was expired. Errors started occurring if you Uninstalled, Installed Extensions, Restart Server Instances or for some even out of random started popping out. We first thought could be a license issue as we had fixed that before but this did not solve the issue. Resolution: Microsoft identified the issue and posted the following update The mi

How to resolve 'Edit in Excel' issues

  Introduction: As you know that D365 BC offers Edit in Excel functionality. But manipulating or customizing such a  standard functionality is difficult as there is not much control available. Hence, solving issues is also a difficult task. I will be resolving the issue for this specific issue, however, the debugging steps are similar. Pre- requisites : ODATA V4 Connectivity tool for Webservices Microsoft Dynamics 365 Business Central Books & References: https://community.dynamics.com/business/f/dynamics-365-business-central-forum/448226/issue-with-excel-add-in/ Demonstration: The way Edit in Excel works is that for a given page a Webservice is created adding PageID and Page Name. Hence, there are some Webservice connectivity checks in place to validate. 1. Edit in Excel Custom Action on the page: If you are adding Edit in Excel Action on the page, please ensure that you are providing appropriate PageName and Filter criteria as Webservice is using these parameters Refer Editworkshe