Introduction:
In my previous blog, I discussed on what is Microsoft Dataverse and how to setup Dataverse Connectivity with Business Central.

In this blog, I will be attempting to share my experience on fine-tuning various parameters involved in Business Central integration to Dataverse provided in connector
Pre-requisites:
- Microsoft Dynamics 365 Business Central
- Microsoft Dataverse
- Basic understanding of Dataverse and Business Central
Books & References:
Demonstration:
1. Dataverse Connection Setup:
For any setups related to Dataverse Connectivity the first step is you go to Dataverse Connection Setup
For any setups related to Dataverse Connectivity the first step is you go to Dataverse Connection Setup
You search for Dataverse Connection Setup

All the setups related to Dataverse Connection Setup are in the actions of the Dataverse Connection Setup

2. Connection Actiongroup:
The actions in the Connection Actiongroup are mentioned as follows -


Assisted Setup - Takes you to the Assisted Setup if the Setup is not enabled.
Test Connection - Runs the Test Connection with the parameter already setup.
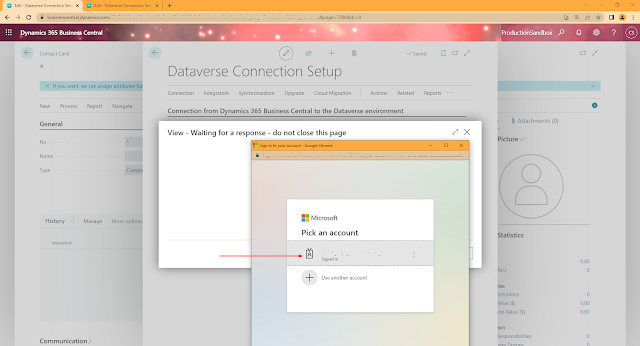
Use Certificate Authentication - Use the OAuth2 Service to Service Authentication Connectivity for Integration. When clicked on the Use Certificate Authentication, a dialog box opens similar to

3. Integration Actiongroup:
The actions in the Integration Actiongroup are mentioned as follows -

Couple Salespersons - Shows the list of Users in Dataverse mapped to Salespersons in Business Central. This is done only when the model type is User and not Team.
However this action is relevant to Dynamics 365 Sales Integration which will be done in the upcoming blogs.
 |
| In Salesperson Purchaser List |
Add Coupled Users to Team - Adds Coupled User to owning Team. Ideally this is used when you would like to move from single user ownership to team ownership.
Redeploy Integration Solution - This actions deploys the Dataverse Integration solution in Dynamics 365 CRM.
Integration Solutions - You can also see the Integration Solution deployed to Dynamics 365 CRM.
Integration Solutions - You can also see the Integration Solution deployed to Dynamics 365 CRM.

Integration User Roles - Shows the Dataverse Integration User Roles. This shows the list of roles assigned to Integration User. This roles are assigned to single user.


Owning Team Roles - Shows the Dataverse Integration Team Roles assigned to the Team. These role are assigned to Team Roles.


Dataverse Integration User - Shows the Dataverse Integration User in Dynamics 365 CRM.

Dataverse Owning Team - Shows the Dataverse Integration Owning Team in Dynamics 365 CRM

Integration Table Mappings - Integration Table Mappings shows the Entities from Dynamics 365 Business Central that will be mapped to Dynamics 365 CRM.

You can set the Table Filter by clicking on Table Filter and you will get the Filter Page.


Integration Table Fields Mapping -
You can also map the Fields that you want as a part of integration.
It involves fields to Fields Mapping, Direction, Transaction Rule, Not Null etc.
It involves fields to Fields Mapping, Direction, Transaction Rule, Not Null etc.
You can go here by going from Integration Mappings > Fields

Coupling: The process of linking the data between Business Central and Dynamics 365 CRM based upon field matching criteria
Uncoupling: The process of unlinking the data between Business Central and Dynamics 365 CRM.
To couple the records in Business Central, go to Dataverse Connection Setup > Integration Table Mapping > Match-Based Coupling.


Incase of update conflicts, you can select the resolution method.

To Uncouple records go to Dataverse Connection Setup > Integration Table Mappings > Uncoupling

Upon Uncoupling, you will get the a confirmation message if the coupling is stop be stopped and that it will no longer synchronize those records.


For failed Uncoupling records, you will get the exact error. You will get the uncoupled records as follows.
You can manually go to that specific record and uncouple.
You can manually go to that specific record and uncouple.

Conclusion:
This blog explains in detail how Dataverse Connection Setup works in Business Central.
For enquiries please email me on olisterr@outlook.com
Thanks.
Comments
Post a Comment
Let me know your comments below. I'll try my best to answer your comment