Introduction:
Dataverse is a single platform where you can store all your data in the cloud and comes API and plugins to connect with the Tables stored.
Dataverse also acts as a Database for Dynamics 365 CRM (Sales, Marketing, Field Service etc..), PowerApps and Power Platform.

In this blog, I will be attempting to share my experience in connecting Business Central to Dataverse using the out of the box connector provided by Microsoft.
Pre-requisites:
- Microsoft Dynamics 365 Business Central
- Microsoft Dataverse
- Basic understanding of Dataverse and Business Central
Books & References:
Demonstration:
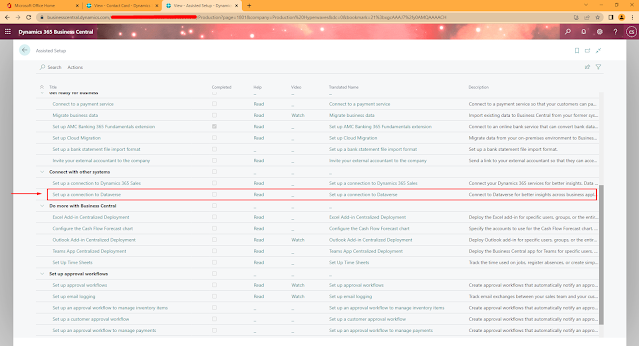
1. Start the Setup Wizard by going to Assisted Setup:
You can search for Assisted Setup > Setup Connection to Dataverse
You can search for Assisted Setup > Setup Connection to Dataverse
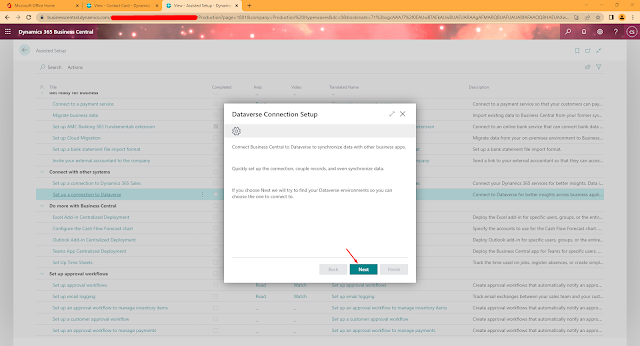
This will open the Dataverse connection setup wizard. Go ahead and hit Next to proceed.
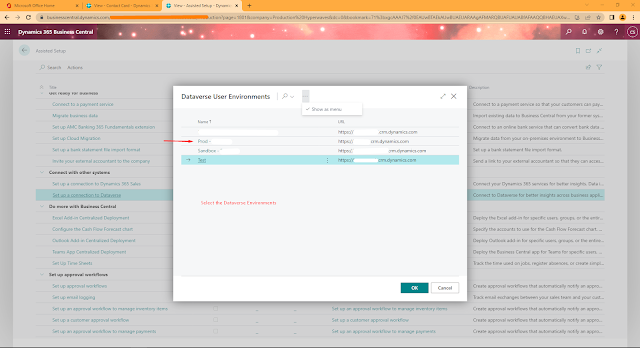
2. Select the relevant Dataverse environments:
The setup wizard will show you the list of environments available, if you are doing this setup the first time, you won't be seeing the list of environments.
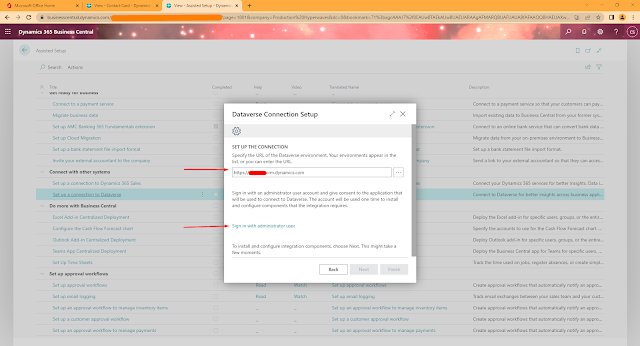
3. Authenticate as Administrator:
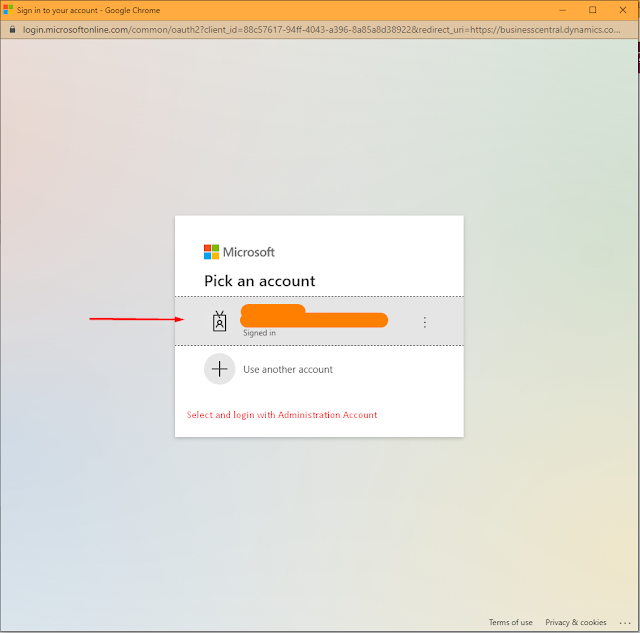
After authenticating with the administration credentials, the Dataverse login screen can be closed and you will see that the User is signed in.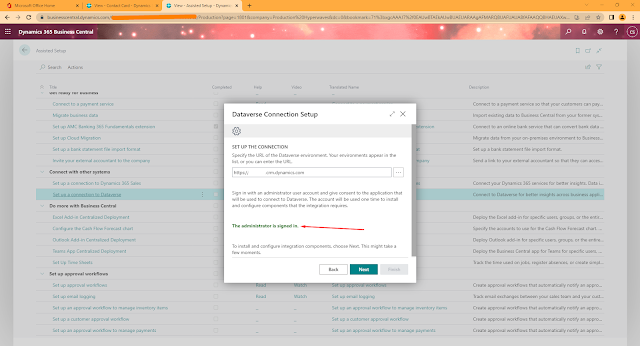
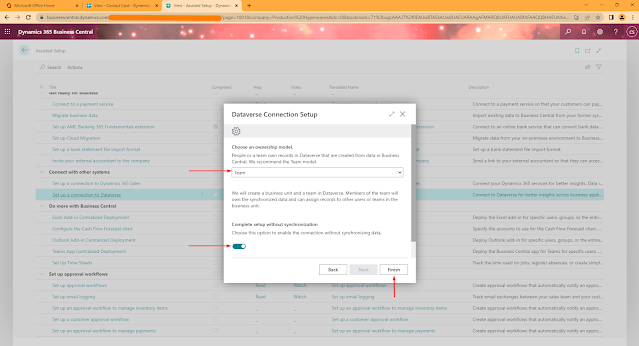
For Ownership as Team, all the rights of the records is with the company.
5. Test Connection:
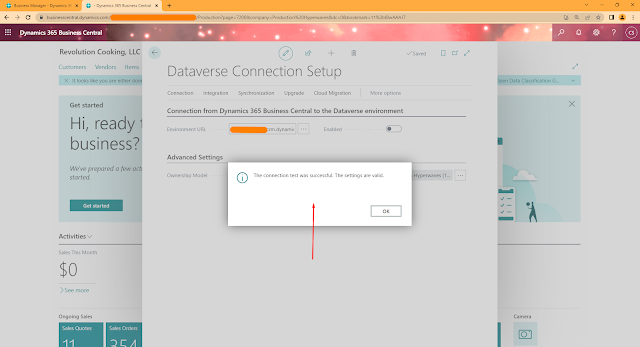
To ensure that the Dataverse Connection Setup is completed, run the Test Connection.

You can add a new Environment by inserting the D365 CRM URL in the textbox.
In order to setup the connection successfully, you need to authentication Business Central user to connect to Dataverse using Administrator credentials.
After authenticating with the administration credentials, the Dataverse login screen can be closed and you will see that the User is signed in.
4. Setup the Dataverse Ownership Model:
In Dataverse or CRM the record ownership is set Team or OwnerFor Ownership as Team, all the rights of the records is with the company.
For Ownership as Person, you will need to setup ownership for each Sales Person.
For more details on Ownership, refer https://docs.microsoft.com/en-us/dynamics365/business-central/admin-cds-company-concept#:~:text=Dataverse%20requires%20that%20you%20specify,for%20records%20that%20are%20synchronized.
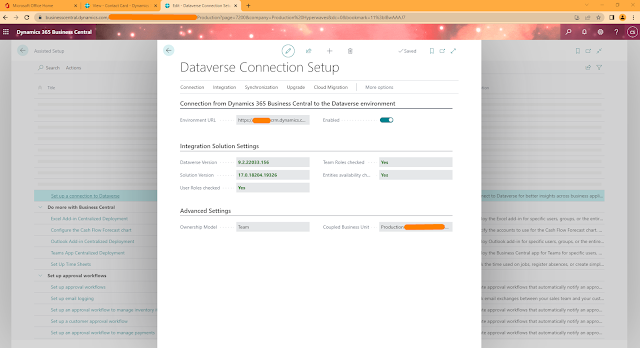
After the Dataverse Connection Setup is completed, you have the ability to enable synchronize the entities. You choose if you want to Synchronize the data then can enable the toggle.
After the setup the Dataverse Connection Setup is completed.
5. Test Connection:
To ensure that the Dataverse Connection Setup is completed, run the Test Connection.
You should be getting the Connection Successful message as shown below.

Conclusion:
This blog concludes here on Dataverse Connection Setup in Business Central.
In this next part I will showcasing the details on field mapping, transformation rules, matching criteria and many more points.
In this next part I will showcasing the details on field mapping, transformation rules, matching criteria and many more points.
For enquiries please email me on olisterr@outlook.com
Thanks.
Comments
Post a Comment
Let me know your comments below. I'll try my best to answer your comment