Introduction:
In our previous blogs, we discussed setting NAVUserPassword and Single Sign-On Authentication in Business Central.
In this blog, we will be working on setting Windows Authentication in Business Central On-Premise.
Pre-requisites:
- Microsoft Dynamics Business Central - On-Premise / NAV 2018
- Understanding of Business Central Authentication
Books & References:
- https://www.olisterr.blogspot.in/2020/03/how-to-setup-single-sign-onsso-for.html
- https://www.olisterr.blogspot.in/2020/03/how-to-setup-navuserpassword-with-ssl.html
Demonstration:
1. Creation of NAVServerInstance:
In order to create NAVServerInstance, you can either add the Server Instance through Business Central Administration or Powershell command.
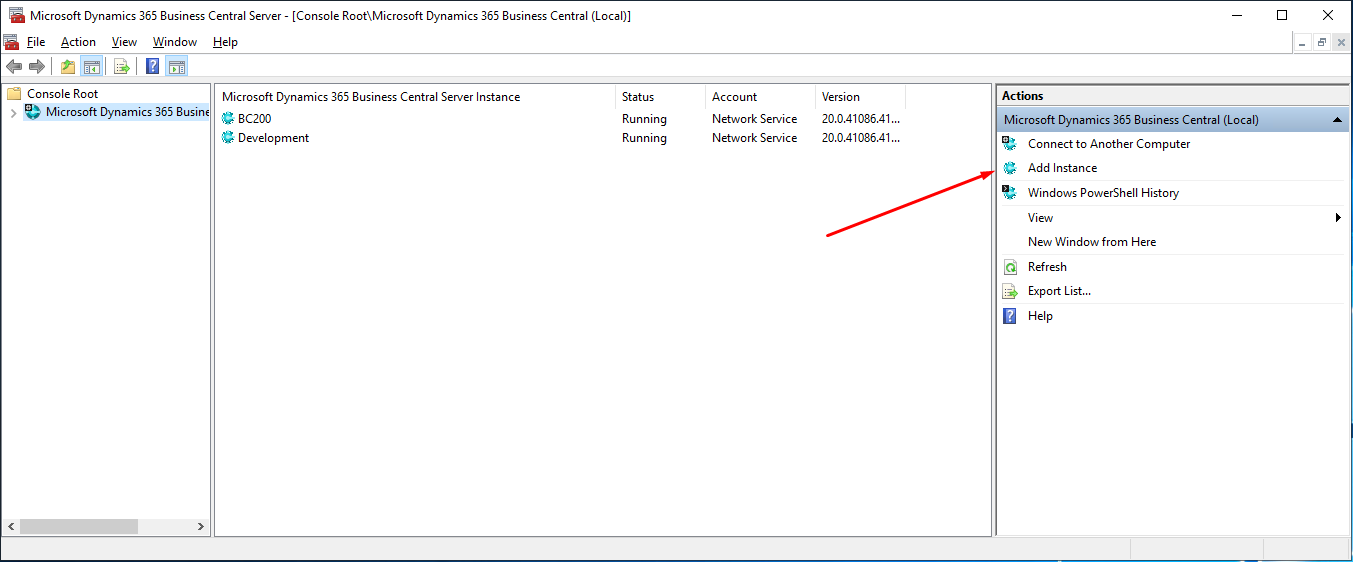 |
| Add Instance - Business Central Administration |
 |
| Add Instance - Ports and Service Account - Business Central Administration |
PowerShell Command:
New-NAVServerInstance
-ManagementServicesPort <ServicePort>
[-ClientServicesPort <ServicePort>]
[-SOAPServicesPort <ServicePort>]
[-ODataServicesPort <ServicePort>]
[-DeveloperServicesPort <ServicePort>]
[-SnapshotDebuggerServicesPort <ServicePort>]
[-DatabaseServer <DatabaseServer>]
[-DatabaseInstance <DatabaseInstance>]
[-DatabaseName <DatabaseName>]
[-Multitenant]
[-DatabaseCredentials <PSCredential>]
[-ClientServicesCredentialType <String>]
[-ServicesCertificateThumbprint <ClientServicesCertificateThumbprint>]
[-ServiceAccount <ServiceAccount>]
[-ServiceAccountCredential <PSCredential>]
[-ServerInstance] <String>
[-Force]
[-WhatIf]
[-Confirm]
[<CommonParameters>]
Ensure that the CredentialType on NAv Server Instance is set to Windows
2. Creation of NAVWebServerInstance:
You will need to run the New- NAVWebServerInstance Powershell command to create WebServer Instance.

Powershell Command: New-NAVWebServerInstance -Server localhost -ServerInstance UAT -WebServerInstance UAT
At this point, both your Server Instance and Web Server Instances are created. These instances are generally created with default configurations provided in the Business Central installation.
Open the navsettings.json file in C:\inetpub\wwwroot\<WebServerInstanceName>\ path and set Credential Type to Windows, update the Port No, Server, and Server Instance Name.
3. Create a Self-Signed Certificate and bind it with the host:
For the creation of Self Signed Certificate in Business Central, refer to Step 3 at https://www.olisterr.blogspot.com/2020/03/how-to-setup-navuserpassword-with-ssl.html
For the creation of Self Signed Certificate in Business Central, refer to Step 3 at https://www.olisterr.blogspot.com/2020/03/how-to-setup-navuserpassword-with-ssl.html
Also, add NT AUTHORITY\NETWORK SERVICE User through Manage Private Keys.
For binding the certificate in IIS refer to Step 7 at https://www.olisterr.blogspot.com/2020/03/how-to-setup-navuserpassword-with-ssl.html
For binding the certificate in IIS refer to Step 7 at https://www.olisterr.blogspot.com/2020/03/how-to-setup-navuserpassword-with-ssl.html
4. Restart NAVServerInstance and NAVWebServerInstance:
Restart the NAVServerInstance through Business Central Administration or Powershell.
Restart the Web Server Instance by restarting IIS Service.
When you open the Business Central URL, you will get a pop-up to insert your Windows Credentials
 |
| Insert your Windows Credentials to log in |
 |
| Business Central Dashboard |
Conclusion:
I hope this blog helps you quickly setup Business Central through Active Directory Credentials.If case of any issue feel free to drop a comment or email me at olisterr@outlook.com
Thanks and Cheers!!
Comments
Post a Comment
Let me know your comments below. I'll try my best to answer your comment